Prerequisites: the immo_space and immo_plan modules installed. The menus are in the Immo app, under Portfolio.
Step 1 · Browse the space register
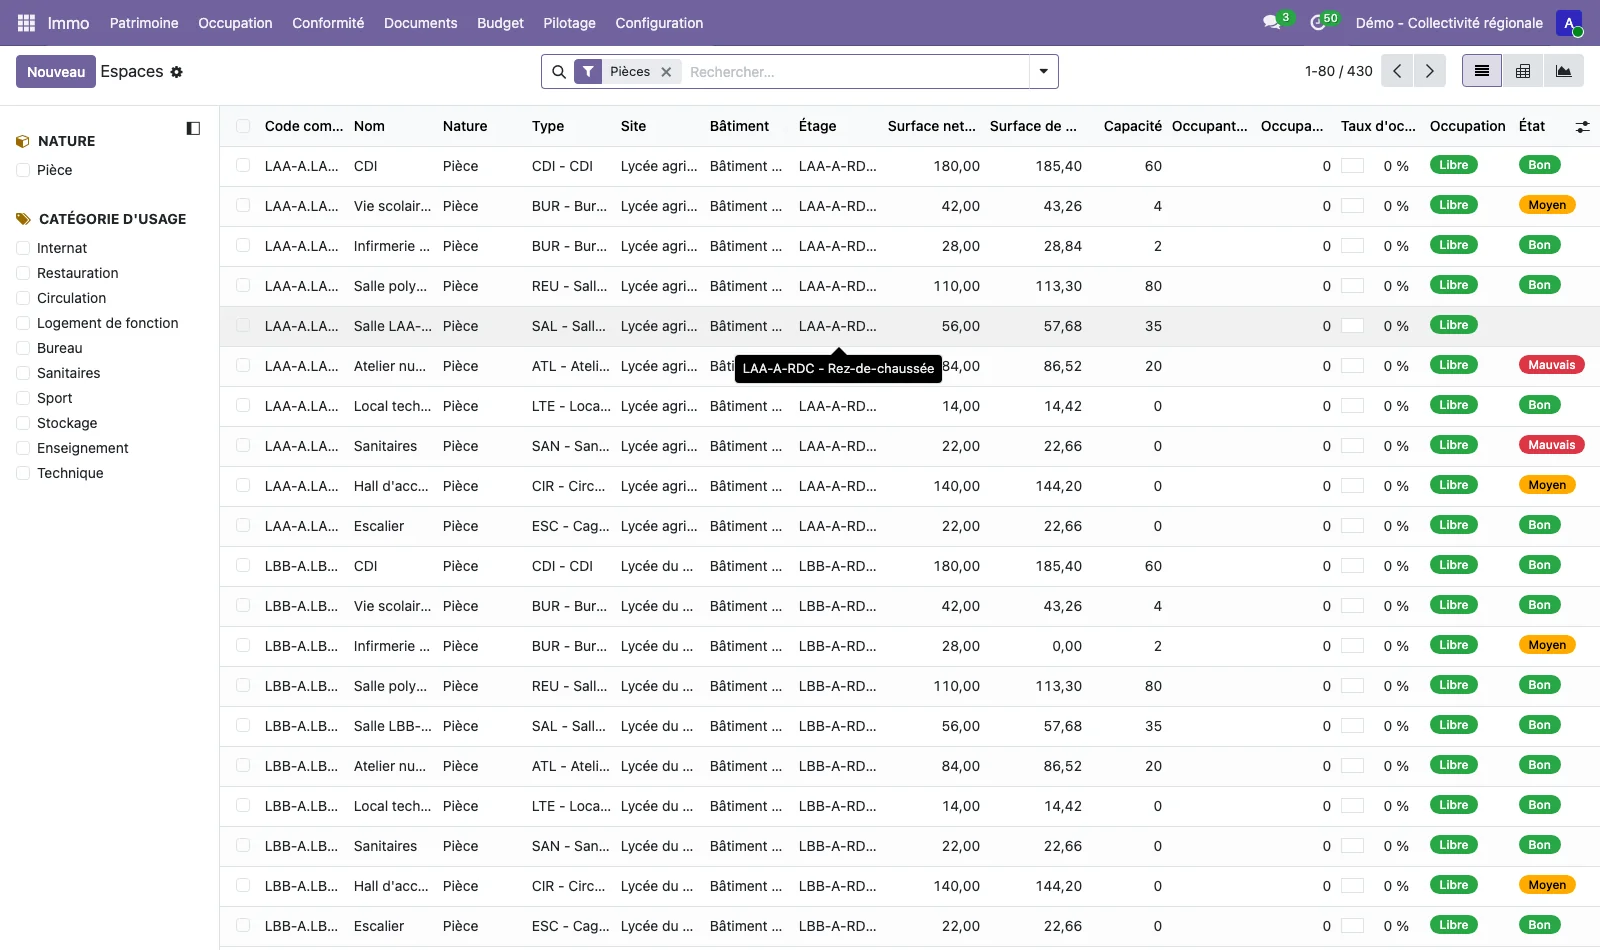
Open Portfolio > Spaces. The list opens on the rooms. The left-hand panel filters by nature (floor, zone, room, outdoor area) and by usage category; the filters at the top isolate incomplete data, possible duplicates and spaces by condition. Portfolio > Territories shows the hierarchy above the sites.
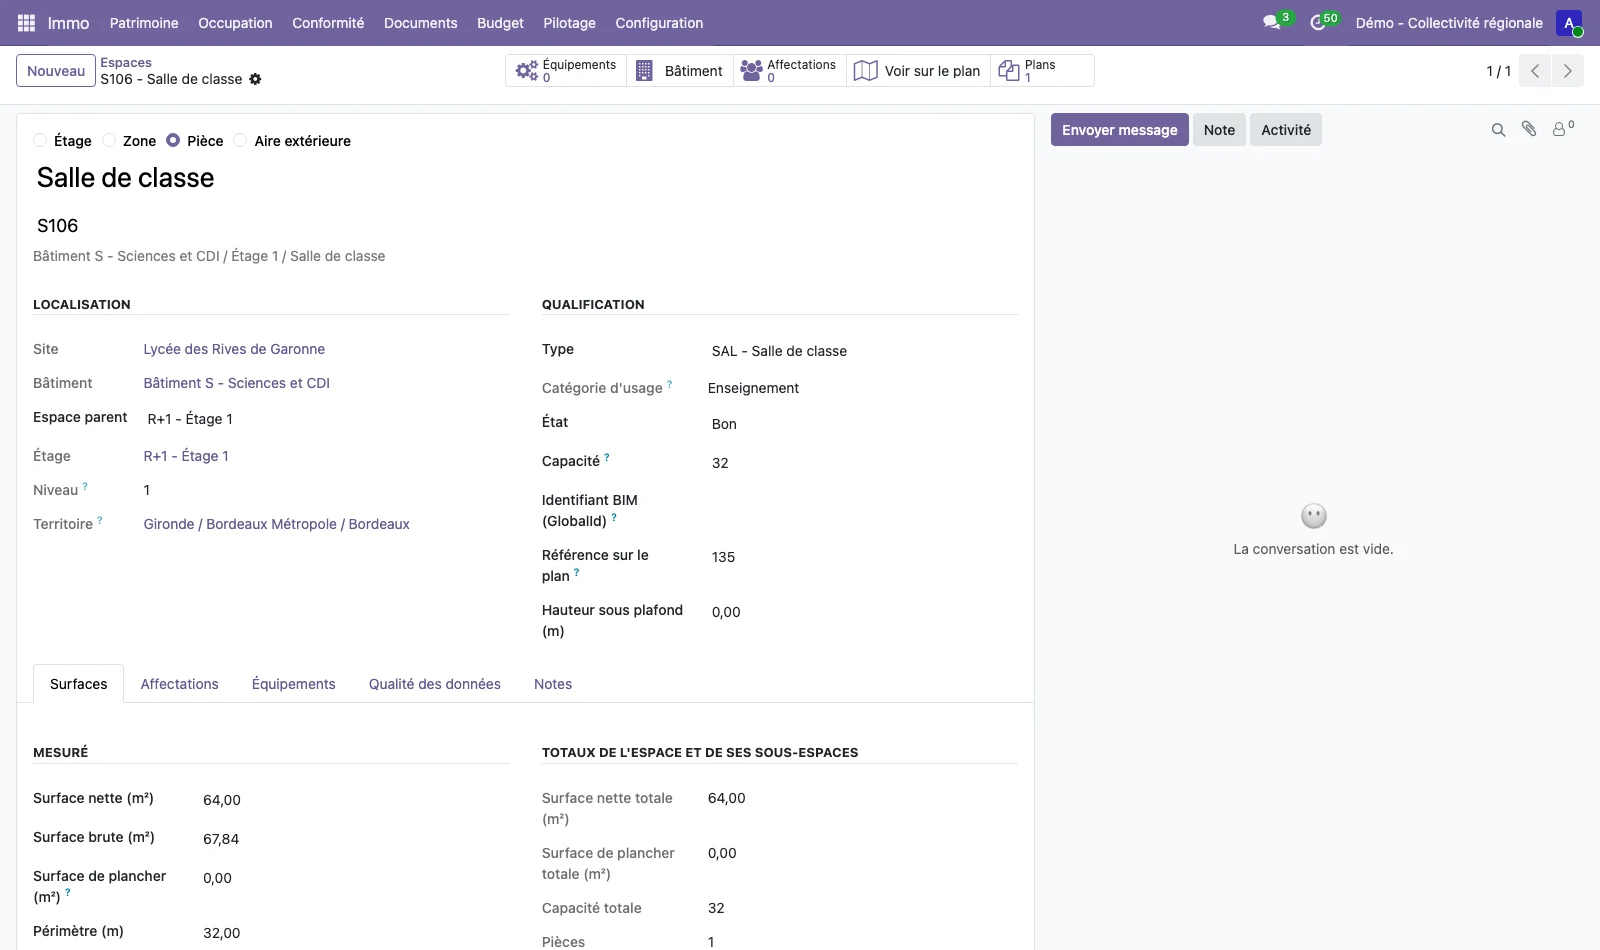
Open a room: the record gives its location (site, building, parent space, floor, level, territory), its classification (type, usage category, condition, capacity, BIM identifier), its measured areas and the totals of its sub-spaces. The buttons at the top open its equipment, its building, its assignments, its plan and its plans.
Step 2 · Import a plan
Open Portfolio > Plans > Import a plan. Upload the file (DXF, DWG, IFC, PDF or image), enter the title, and choose the plan type, site, building, floor and scale. In the reading options, state which layers contain the rooms, and tick Create missing rooms so that outlines with no matching room create the room, and Update room areas to carry over the measured area.
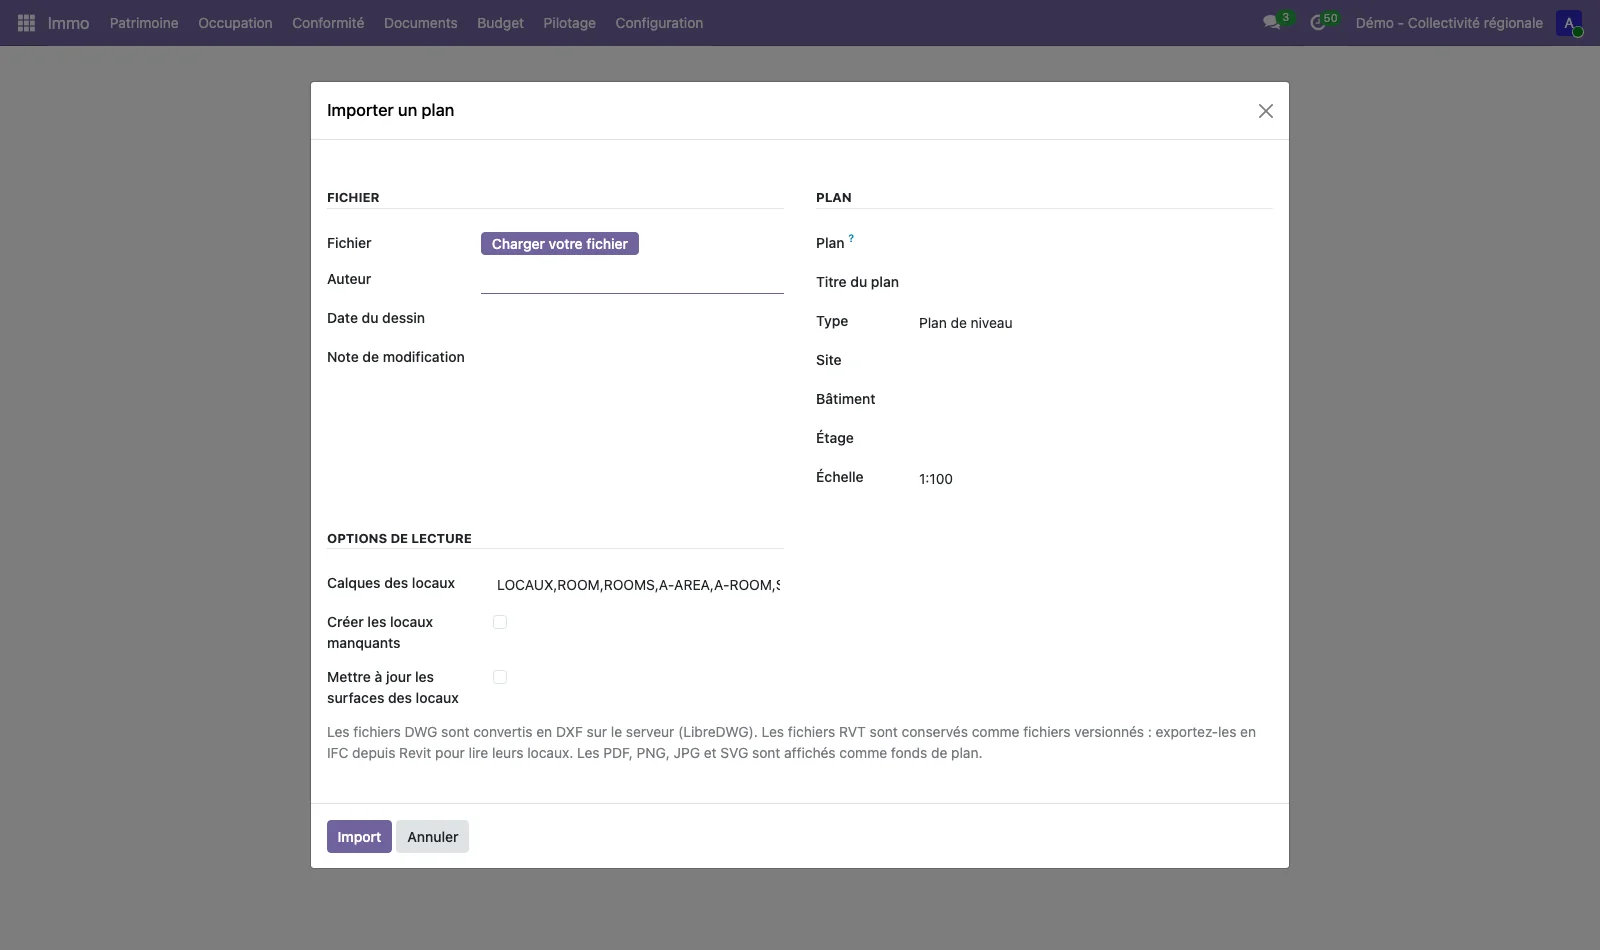
DWG is converted to DXF by LibreDWG, which must be installed on the server; without it, import the DXF. An RVT file is kept as a versioned file and is used through an IFC export made from Revit.
Step 3 · Check consistency and version
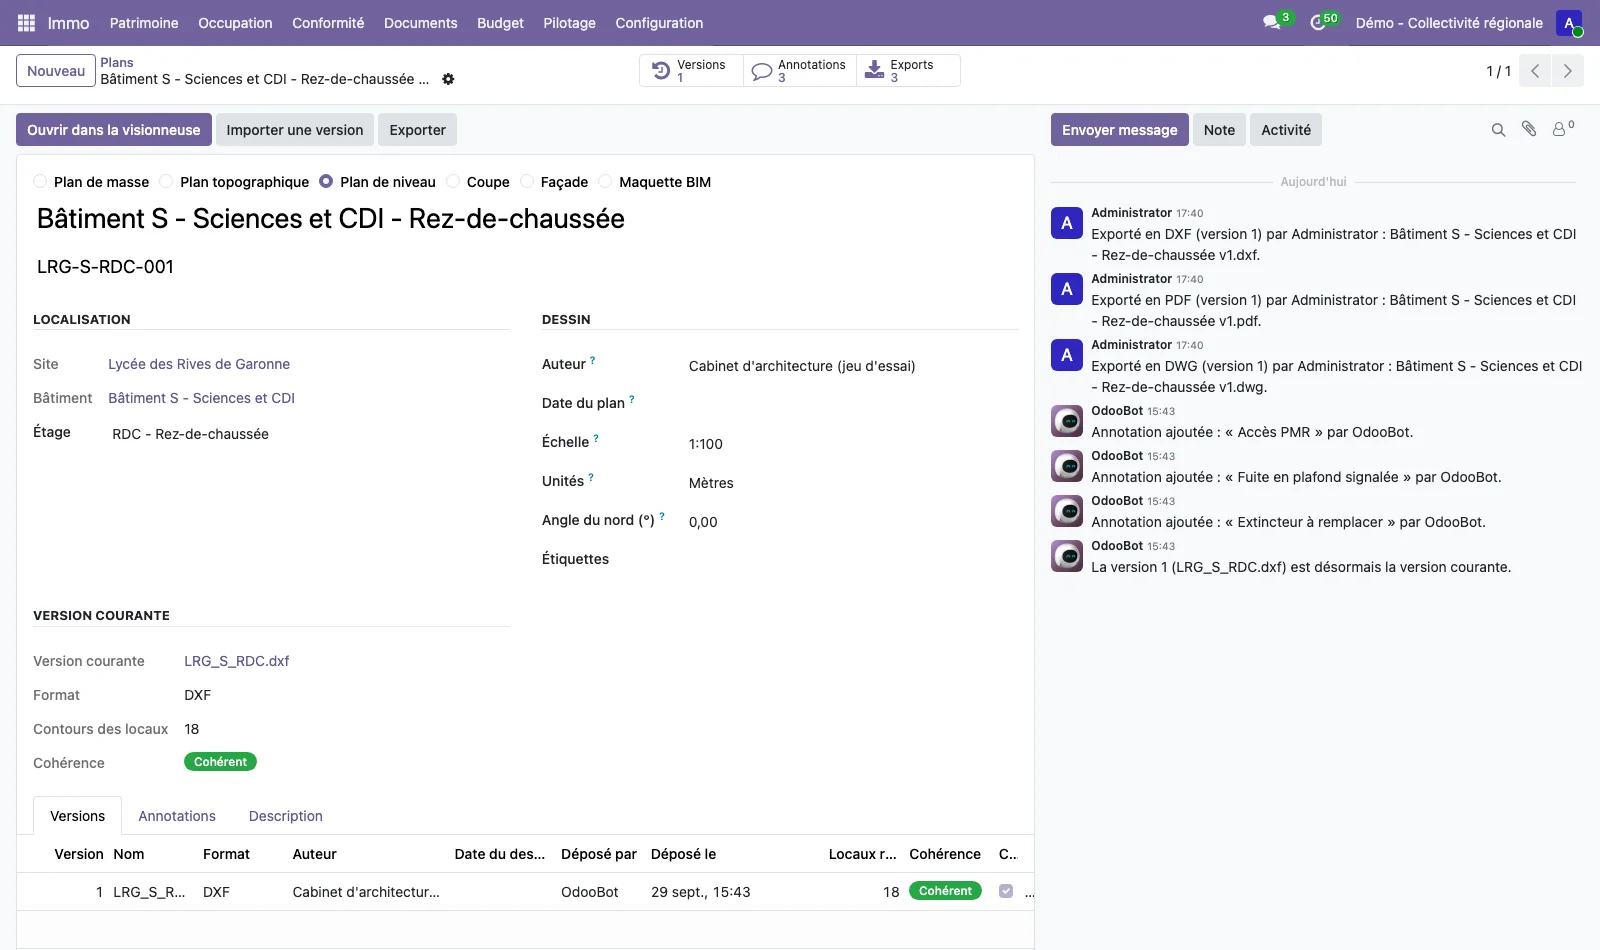
When the import finishes, the plan record opens. It shows the current version (format, number of room outlines, consistency), the version history, the annotations and the exports. Consistency compares the rooms in the drawing with the rooms in the register; a discrepancy is corrected by importing a new version, which keeps the previous ones.
Step 4 · Open the plan viewer
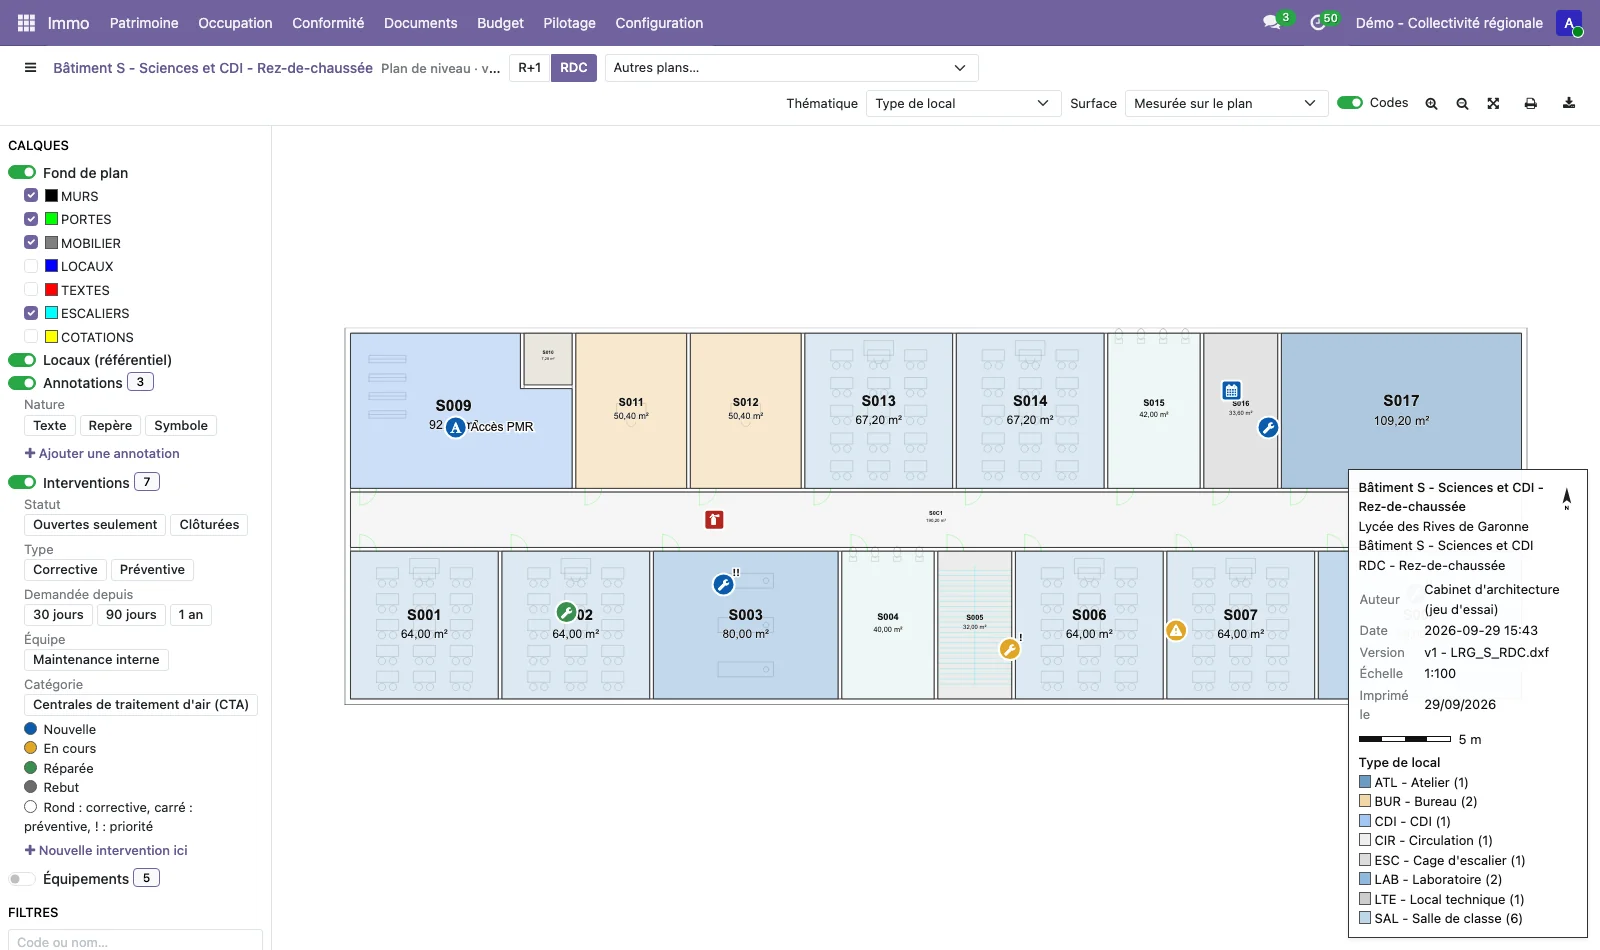
Click Open in the plan viewer, or open Portfolio > Plans > Plan viewer and choose a plan. On the left, the drawing layers, annotations, work orders and equipment can be hidden or shown, and the filters isolate a room type, a usage category, a condition or an occupancy. The Theme menu colours the rooms; the Area menu chooses the area displayed on each room. Clicking a room opens its attributes.
Step 5 · Draw the rooms on a PDF plan
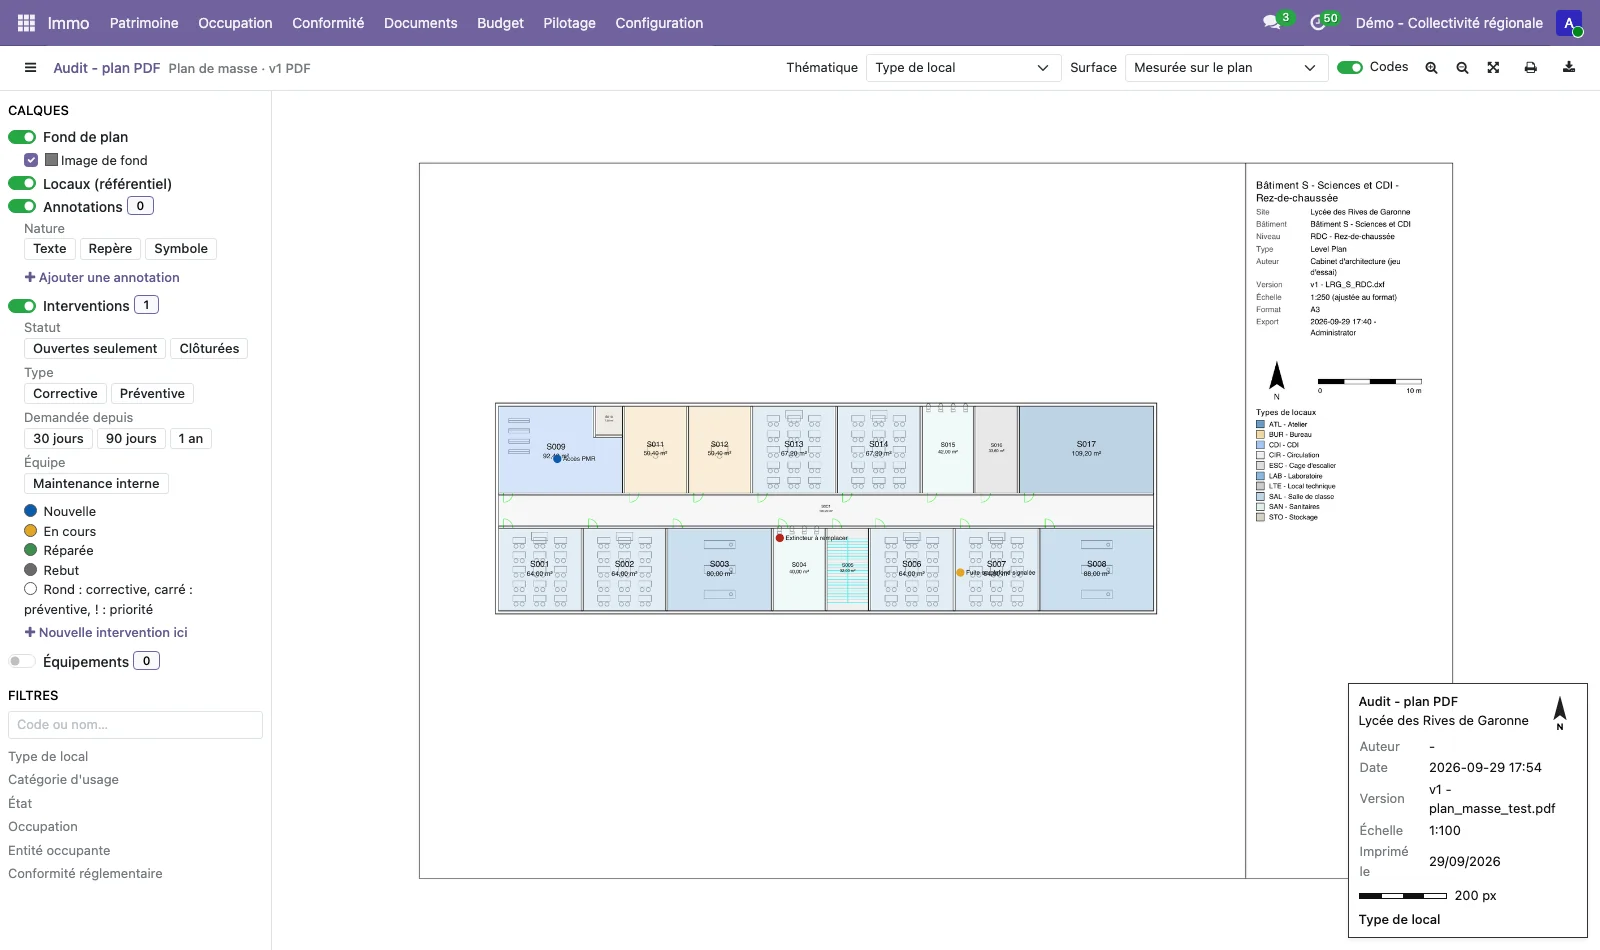
For a PDF plan or an image, enter the Sheet scale at import: the file is then displayed to scale, and the graphic ruler is in metres. In the plan viewer, choose Draw a room, click the corners of the room (Shift key for a straight side), close the outline with a double-click or the Enter key, then choose the room from the floor's list, or create it.
Step 6 · Place a work order on the plan
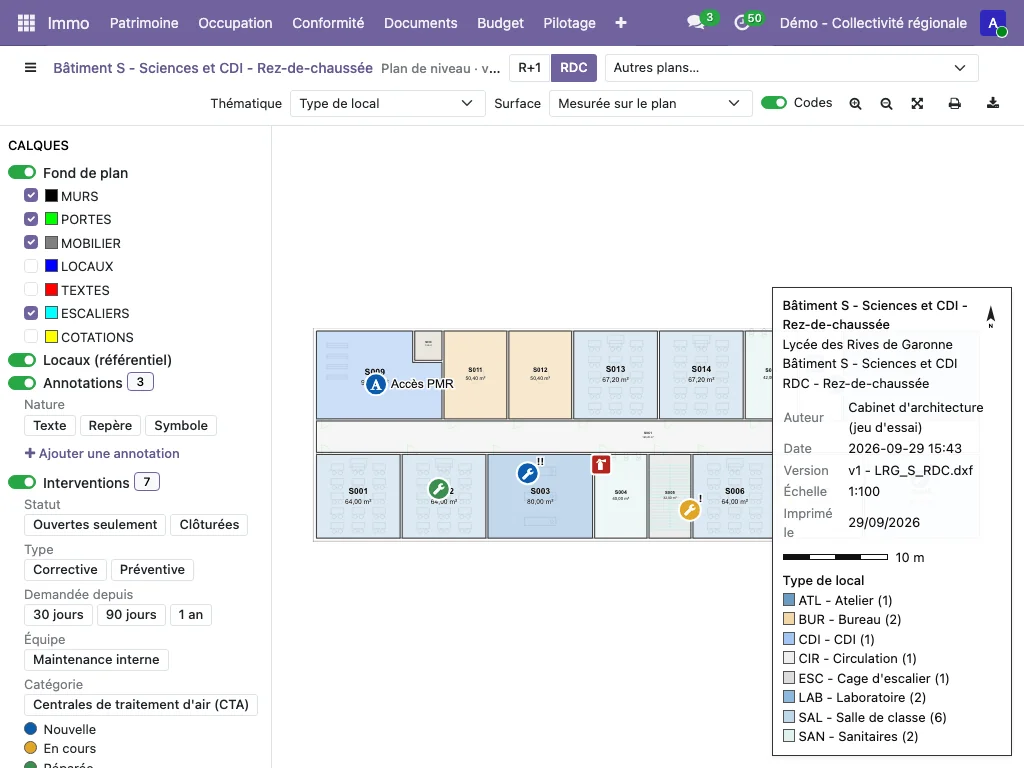
Activate the Work orders layer. Choose New work order here, then click on the plan: a provisional pin appears and the detected room is shown in a window where you choose Confirm, Move or Cancel. The quick form asks for the subject, type, priority, room equipment and team. Outside any outline, the floor's list of rooms lets you choose the room without moving the point. An existing marker is moved by dragging, with confirmation.
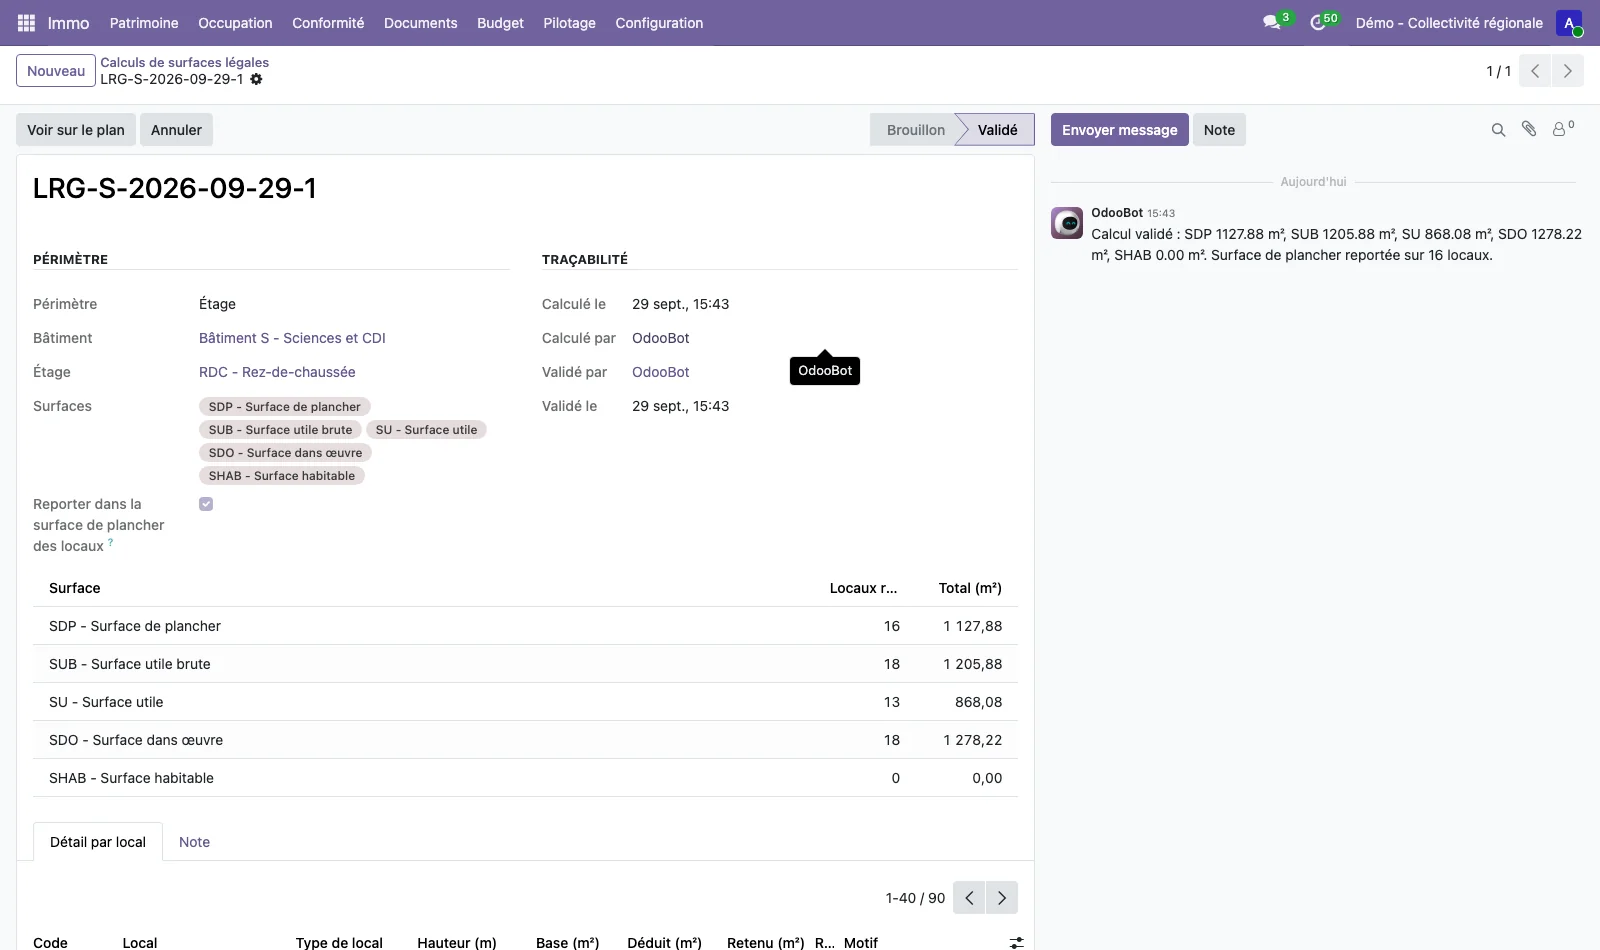
Step 7 · Calculate legal areas
Open Portfolio > Plans > Legal areas and create a calculation: choose the building and the scope (floor or building). Area types (floor area, gross usable area, usable area, internal area, living area) are set in Configuration > Plans > Legal area typologies, with their coefficient and minimum height. Validate the calculation: it keeps its date, author and totals, and the floor area can be carried over to the rooms.
Step 8 · Export the plan
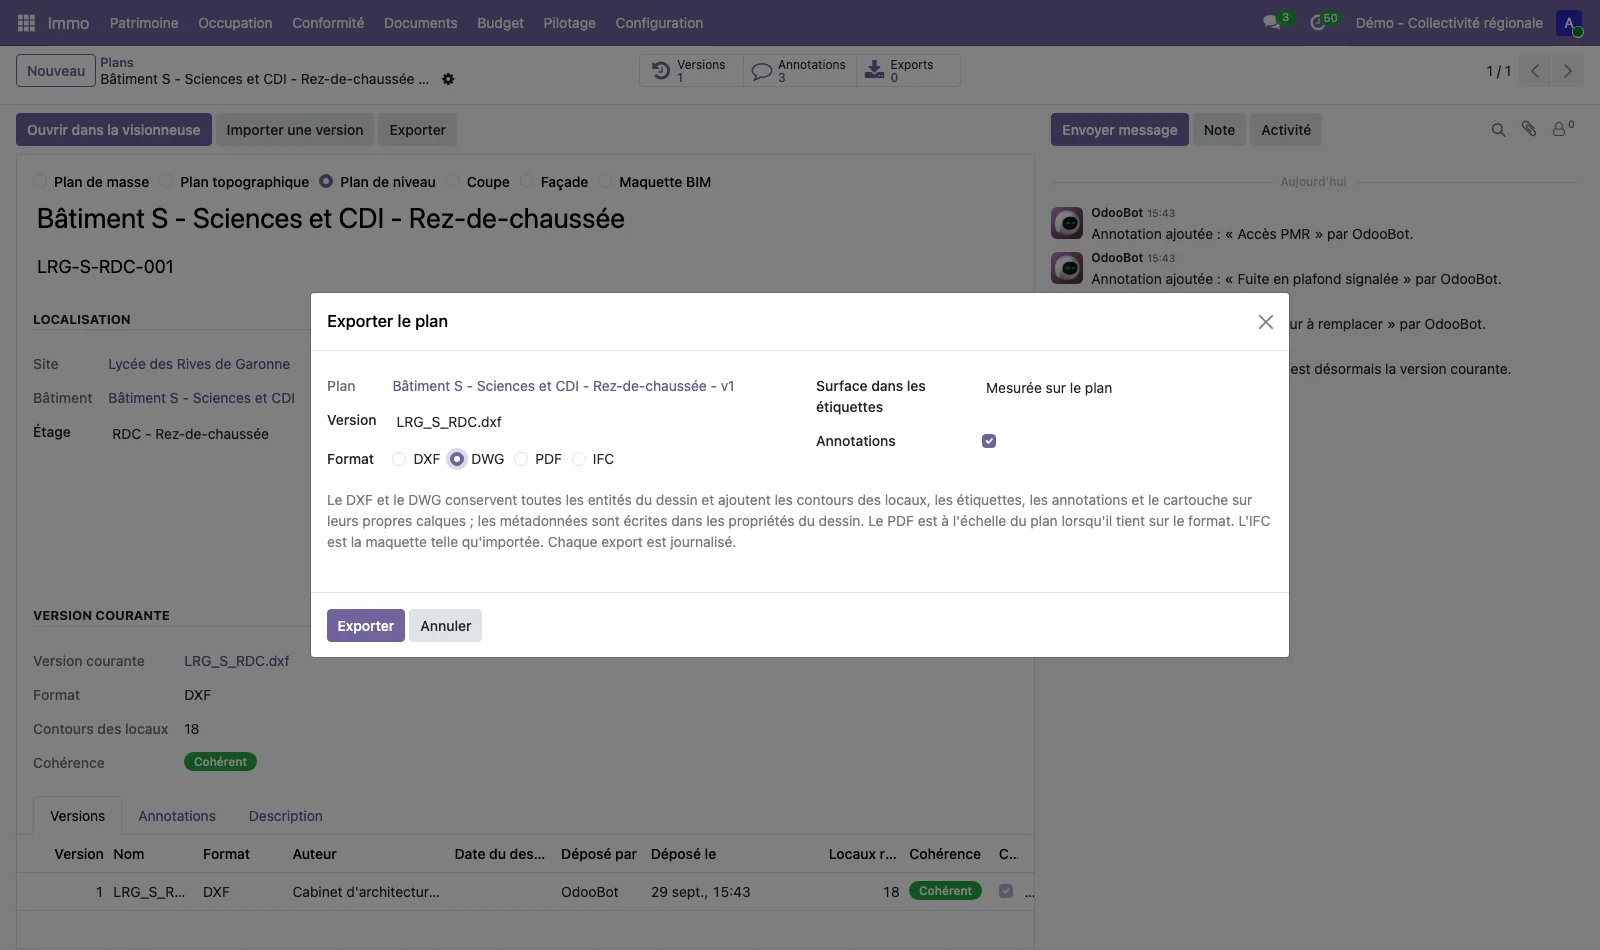
From the plan record, click Export, choose the format (DXF, DWG, PDF or IFC) and, for the first three, the area shown in the labels and whether to add the annotations. The export is recorded in the Portfolio > Plans > Exports log with its author.